5.18.2014

Around the yard. A few macros. New spring growth.

Spring is a beautiful time of year.  Birds are singing and plant life is growing. The colors are fresh, and where earlier there was brown, now there is green... in many different shades.

These pictures were taken with a mixture of cameras and lenses.  The Tamron 90mm macro was used on the Olympus E-M1 and Sony NEX 6.  I focused manually using the peaking feature.  And I also used the 60mm Olympus macro on the E-M1.  I used the smallest focusing point with auto focus.


Red Maple


Maple


Maple seeds.  

I think the lowly dandelion can look very pretty.


These will be blueberries.

5.17.2014

Rokinon 12mm F2 for Sony NEX: Purple Fringing? yes!

[This is my seventh post on the Rokinon 12mm F2 for Sony NEX.]

Like vignetting (see prior post), I feel that the purple fringing seen in the images below are all part of the nature of a third party ultra wide angle lens that has no electronic connection to the NEX camera body.  I don't know for sure, but I don't think this lens performs any less well than would native lenses; it is just that there is no way for the incamera processing to eliminate the Rokinon's vignetting and purple fringing.  However, it is generally an easy (but extra) step in post-processing to make appropriate corrections.

The purple fringing is very prevalent.  It is visible in each of the four images below.  These were taken at F2, F4, F8 and F16.  Further below I have shown 100% crops from each one. Though I am choosing to make corrections in Lightroom, in most images it really won't make a difference when viewed at normal viewing sizes.

The four images taken (F2, F4, F8, F16)

F2

F4

F8

F16
  
----
The four 100% crops

The four crops that follow are taken from the area of the
original image circled in red.


F2 100% crop

F4 100% crop

F8 100% crop

F16 100% crop
---- 
How to fix this

What to do?  Well, in Lightroom, things are made easy. Just a click of the check-box for "Remove Chromatic Abberration" and most of the work is done.  For a portfolio image, you might want to instead play with the eyedropper to fine-tune things.


F8 after applying Lightroom "remove chromatic abberation" tool.
This is far better, and remember this is a 100% crop.

----
If that isn't good enough

Here I have used the eyedropper tool as well as the automatic removal tool

F8 with "remove chromatic abberration" tool,
plus customized removal with eyedropper.


5.11.2014

Rokinon 12mm F2.0 for Sony NEX: how to fix the vignetting

[This is my sixth post about the new Rokinon 12mm (18mmm-equiv) lens.]

In my last post I showed four images taken at F2, F4, F8 and F16 to show the amount of vignetting I am getting with this lens on a 16mp Sony NEX-6.

Unfortunately, expect at F2.0, it is not entirely obvious when viewed at "web sizes" like the 750 pixel wide images shown in this blog  space.  So I have posted the images large on my Web site here:
http://www.peterfraileyphoto.com/rokinon12vignetting


Below: F2 before and after


In Lightroom:  Lens Vignetting Sliders:  Midpoint=0; Amount=80

Below: F4 before and after (more obvious on full size image)


In Lightroom: Lens Vignetting Slider: Midpoint=0, Amount=40

Below: F8 before and after (more obvious on full sizes image)


In Lightroom: Lens Vignetting Slider: Midpoint=0, Amount=30


Below: F16 before and after (more obvious on fill size image)


In Lightroom: Lens Vignetting Slider: Midpoint=0, Amount=20

5.09.2014

Rokinon 12mm F2.0 for Sony NEX: vignetting? yes!

[This is my fifth blog post about the new Rokinon ultra wide angle 12mm (18mm-equiv) lens for Sony NEX.]

The other day, before walking into my office, I took the following shots from the office parking lot basically aiming for a satellite dish on a far-off tower.  Being a wide angle lens, the tower was considerably closer than it appears in the photos.

Anyway, I wanted to test vignetting, the existence of which had been quite obvious in my early images.  There are four images here, shot sequentially at F2, F4, F8 and F16.

There is significant vignetting in my opinion, with more of it when shot wide open and less of it when stopped way down.  But even at F16, it is there.

I was disappointed to see it so prevalent.  This is my first lens wider than 24mm-equiv.  Perhaps this is just the nature of the beast.  But it also occurs to me that this lens may be no different in this characteristic than native wide angle lenses from the major brands.  The difference is that with native lenses (e.g. Olympus lens on an Olympus camera) the in-camera processing can rid the image of the vignetting.

Yes, all of these images below can be post-processed (my preference is Lightroom) to remove vignetting.  However, the F2 vignetting is very problematic.  To get rid of it completely requires so much brightening that there is a loss of color in some situations.

Note:  At this size of 750 pixels wide (compared with viewing on my 24" monitor) it's difficult to see the vignetting, except perhaps at F2.  In fact it is only at F16 that you can see how really dirty my sensor is.  On my computer monitor I can see dirt at F4 and F8.

I am working on processing these same images so I can post BEFORE and AFTER  images.  Each one needs some work.

F2 - very obvious vignetting, corners plus edges

F4

F8

F16


5.02.2014

Rokinon 12mm F2.0 for Sony NEX: DOF at 12 feet and F11

[This is my fourth post on the new Rokinon 12mm F2.0 for Sony NEX]

In the prior post I showed how setting this lens' focus ring at 12 feet was all you needed to do if your subject is between 6 feet and infinity.  And even that superb depth of field assumed setting aperture at F2.0.  The DOF only gets greater as you stop down.  At F11 when focused at 12 feet, DOF is a whopping 2 feet to infinity.


Above is a shot I took while having a cup of coffee this morning.  F11 with focus set at 12 feet.  The coffee mug is about 2 feet away from the sensor plane and about 18" from the front lens element.

The tippy top of a spruce tree is in the middle of the frame, and is pretty much to farthest point of the scene.  I think it looks reasonably sharp (see 100% crop below); nevertheless, I believe that the sharpest images with this lens are at F4, F5.6 and F8.  But since one characteristic of an ultra wide angle lens is that it emphasizes the foreground (in this case, the coffee mug), I am wondering how sharp the distance background really needs to be.  In the field I don't think I will fear F11.

100% crop from the center of the image.
tip top of the center spruce tree looks reasonably sharp to me.
F11 with focus ring set at 12 feet.  DOF= 6 feet to infinity.


4.30.2014

Rokinon 12mm F2 for Sony NEX: Incredible depth of field


[This is my third post on the Rokinon 12mm F2.0 lens for Sony NEX]

One of the first things I noticed as I walked around my house and yard taking pictures the other day with this lens on a Sony NEX-6, is that it is really difficult to selectively focus.

The problem ( well, more of a reason than a problem) is the h-u-g-e depth of field of this ultra wide angle lens. It seems to me that everything is in focus.  Selective focusing with narrow apertures, like F8 or F11, is especially problematic.  The resolutions of the EVF and LCD are not sufficient for manual focusing without using the focus peaking feature, in my opinion.  This is partly due to the characteristics of wide angle lenses, which have everything appearing farther away (and therefore smaller).  Sometimes I use both focus peaking and magnification.

I have found that the best way to successfully focus selectively (i.e. focus on a single spot) is to use F2, where depth of field is least, and then turn the aperture dial to your desired F-stop prior to pressing the shutter.

This huge depth of field comes with the territory.  Just look at the chart below from DOFMaster.com. As an example, at F8 the hyperfocal distance is 3 feet!  This means that if you focus at 3 feet, everything from 1.5 feet (half of the 3 foot focusing distance) to infinity will be in [reasonable] focus.

[Go to the DOFMaster Website and print out some tables for your lenses and cameras. There's a cool calculator, too. I have it on my computer.  Also, I have the app for my iPhone.  The Web site has a direct link to the iTunes App store.  The Web site indicates that soon there will be an app for Androids, too.]


See the prior paragraph about dofmaster.com
This table works for a 12mm focal length lens on a Sony APS-C sensor.

A lightbulb went off

At some point the other day I asked myself,  "if everything is in focus, why bother trying to focus?"  Look at the table above. See what happens if I simply set the manual focus at 12 feet.  The shallowest DOF is at F2 (this lens doesn't have F1.4 so you can skip that column in the table), where everything is in focus from 6 feet to infinity. DOF increases as I stop down the lens, arriving at 2 feet to infinity at F11.  I didn't go any further than that, but this lens has settings up to F22.

So... no matter what F stop you pick, if you set the focus ring at 12 feet, everything will be in focus from, at a minimum, 6 feet to infinity.


This is where I calculated the lens focuses at 12 feet
on this sample.  Note the white dot is in line with the hash mark.
(I have no idea what that little sideways " L " on the distance

scale means, as it definitely doesn't represent infinity... 
maybe it does on the mFT version.)


4.28.2014

Rokinon 12mm F2 for Sony NEX: First few snapshots

[This is my second post on the new Rokinon 12mm for Sony NEX]

Like many others, I am sure, the first experience I have with a new lens is likely to be sitting on a couch in the living room with the lens box right at my side.  This time of year I might be watching the Boston Red Sox on TV, but no matter, I start my understanding of any new lens by panning around the room aiming at various objects and firing off a few stills.  I am sure I am not the only one who takes a few shots of his/her feet. They are great for testing focusing speed,  DOF and background blur.

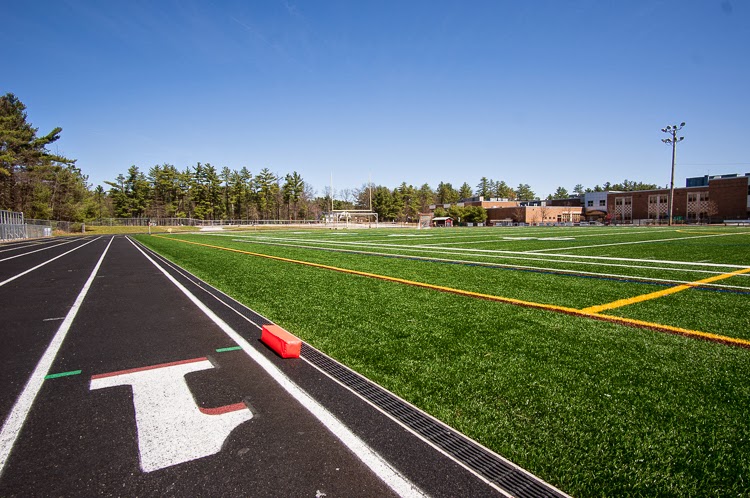
The next experience is usually over a weekend, if the weather is good.  I might grab the camera and new lens for  walk around the yard or walk over to our town's high school to shoot at some brick walls.

In the last few days I have done all of the above.

F2

F2 Only blue part of pen in focus

F8

F2

F2


F8

F2

F8.  I don't like the vignetting, especially in the upper the left.