2.28.2014

Four nature pictures from the back yard

These are four images I submitted to my photo club for our February "salon".
The first two were taken with the Sony NEX6 camera and an older Tamron 90mm macro.  I just love the feel of this manual lens on the Sony NEX6 because the focus peaking feature on the Sony body is so helpful for focusing.  (Not perfect, but helpful).

The second two were taken with Olympus bodies (E-M5 for the maple leaf with the 75mm F.18; and the E-M1 for the snowy day picture with the 12-40mm zoom).

Not until after I submitted these images did I realize that:

1.  They all were taken in my yard, and
2.  They are nature scenes (no hand of man), and
3.  They represent the four seasons, in order, starting with spring.

larger images can be viewed here:

http://www.peterfraileyphoto.com/p989297934

Spring:

Summer:

Fall:

Winter:


2.21.2014

60mm Olympus macro at F2.8: a few flowers

As it is for most people I imagine, photography for me slows down in winter.  I do take a weatherproof point and shoot camera with me when skiing, and I do like to photograph the family (indoors) during holiday celebrations and family get-togethers.  Other than that, when I feel a need for some "shutter time", I frequently visit the Tower Hill Botanic Garden near Worcester, Massachusetts. Of course, we're talking about indoor photography this time of year.

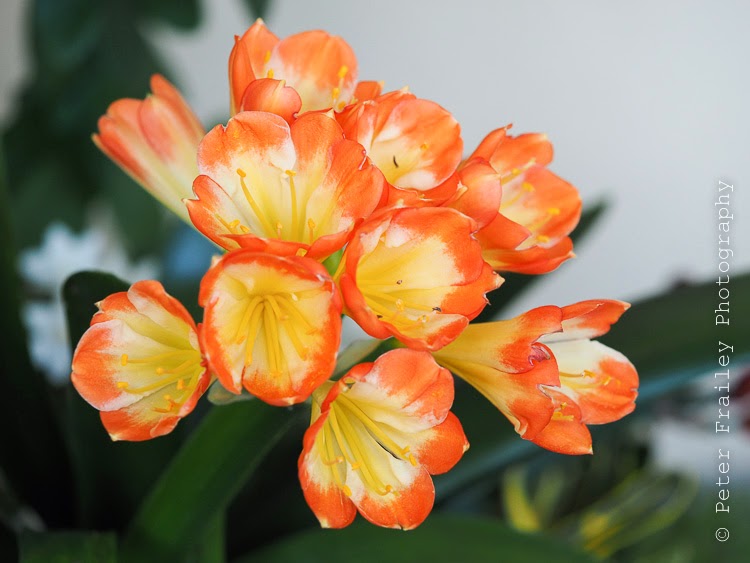
In the past I have concentrated on using ambient light only and narrow apertures for good depth of field.  More recently (last year) I began adding fill-flash to improve the quality and direction of the light.  And during this recent trip I decided I would use primarily a narrow depth of field approach.  Shooting wide open means F2.8 on the Olympus 60mm macro lens. The reason for this, is that indoor flowers are hard to isolate from the background, and backgrounds indoors are annoyingly distracting.  The narrow depth of field blurs the background, but also causes much of the flower to be blurry as well.

At F2.8, having enough natural light was never a problem.  But the light was pretty harsh, as it was a blue sky day without any clouds to diffuse the light.

I set up my camera as follows:

1. Center weighted metering.

2. Single shot auto focus.

3. Spot focusing using smallest focusing appoints.

4. Aperture priority with aperature set at F2.8.

5. EV compensation set at minus 1.

Then, to determine my exposure I simply adjusted ISO until the shutter speed was 1/200 sec or faster.  I realize with image stabilization I might have been able to hold this lens/camera combination steady at perhaps 1/60th, but in this setting there is moving air indoors due to large fans overhead.  1/200sec is my "safe" shutter speed for this lens.

The purpose of the minus 1 EV compensation was to underexpose the natural light by 1-stop.  Another way to look at this is that I cut the natural light coming into the camera by 1/2.  (The flash was manually to provide the other 1/2.)

All these images were taken at speed of 1/200sec to 1/2,000sec.  ISO ranges from 100 to 800.

Sometimes I should have paid more attention to what I was doing.  One image is 1/800sec and ISO800.  Had I noticed this I would have reset the ISO to 200 thereby dropping the speed to my minum required 1/200sec.  On the other hand, I'm not so sure that I notice a difference in image quality between ISO200 and ISO800 on the Olympus E-M1.

I set up my flash as follows:

1. I used a Metz 50; but at such close quarters 
any flash with a flexible head will do just fine.

2. I tilted the head as much as 90 degrees to the left or right, 
to provide fill-flash from the side. 
(If natural light was coming from above and to the left, 
I would tilt the head to the right and perhaps horizontally 
to provide fill flash into areas with the darkest shadows.)

3. I used the Through The Lens (TTL) setting and HSS (high speed sync).  
Even with TTL, I was making Flash Exposure Compensation (FEC) 
with each flower or  different angles.  
(Another approach would be to use Manual settings.  
The Metz setting range from full power 
all the way down to 1/128th power.)


After taking a picture, I always check the histogram to be sure of the exposure is correct.  Fortunately, flowers don't move much so after reviewing your first shot you can go back to the flash and adjust FEC up or down.

I'm not saying the pictures below are portfolio shots.  Far from it.  But I do like the fact that the exposures are good and there are really no signs of a fill-flash being used.  And that was my objective... other than spending an hour or so in a beautiful place.

Larger images can be found on my Web site, here:
http://www.peterfraileyphoto.com/p450183122

My favorite is #1.


2.14.2014

Getting Used to the Olympus 75mm F1.8: A Flyfishing Show

Like the photos with the 75mm lens I posted in the prior two blog posts, the images below were mostly taken at F2, with a few at F1.8 and a few at F2.8. ISOs were all over the place, ranging from 200 to as high as 3200 (when I used F2.8 in the second picture).

You can find larger versions of these images, depending on your monitor resolution, and metadata information on my Web site here:


None of the images below can give much information on the sharpness of this lens, as these are posted here with a maximum width of 750 pixels and therefore must be greatly compressed from the original files which are 4500 pixels wide.  Even on my Web site, which scales the images up or down depending on the resolution of your monitor, the maximum size is 1550 x 960 pixels.

However, I do think these images are helpful to see what kind of depth of field and out-of-focus foreground and background you can get with F2 on Olympus gear.  Hopefully these pictures will give a sense of that.  I think the depth of field is pretty comparable to what one gets with F4 and a 150mm lens on full frame gear, assuming the same focusing distance.

The scene is a winter flyfishing show in Marlboro, Massachusetts USA on a Friday afternoon.  I took very few pictures as most of the time I was talking to old friends.  I fully intended to return the next day to spend some serious time with the camera, but a snowstorm came along and I stayed home.


2.07.2014

Getting Used to the Olympus 75mm F1.8: A few car shows

In my last post I shared some pictures I took during a family wedding, using the 75mm F1.8 Olympus lens.  Since I am not much of a people photographer (I am reluctant to get too close) the effective focal length (150mm) of this lens really helps get images without being noticed.  It also provides a nice shallow depth of field, as the lens is already tack sharp wide open at F1.8.

This past fall, I attended several car shows on the lawn of the Larz Anderson Auto Museum in Brookline, MA.  I usually carried two cameras.  First, attached to a carabiner on my belt I clipped the Sony NEX-6 with the kit 16-50 zoom lens for my wide and normal angle shots.  On my shoulder I carried the Olympus E-M5 with the 75mm lens.

75mm F1.8 shown here with $25 third party lens hood
(as far as I can tell it is identical to the $75 Olympus hood, which
must be purchased separately.)
You'd think for a $1000 lens, Olympus could supply a hood as standard.


The images shared below are with the 75mm lens.  Some are "people" shots which I was able to get from a distance.  Other shots are my attempts at being creative with the cars and the shallow depth of field of the 75mm lens.

Depending on your monitor resolution, larger images are available for viewing here:
http://www.peterfraileyphoto.com/p757525090


Camera Settings for the 75mm lens

Cars Outdoors:

For outdoor pictures often the problem is too much light when shooting at wide aperture (the above were shot at F2).  I believe all of the car photos were done with the E-M5 with its maximum shutter speed of 1/4000sec.  In this case, using Aperture Priority and AutoISO you will without-a-doubt get only ISO200 and the camera will speed up the shutter to a level far above my minimum required speed of 1/125sec or 1/160sec for this lens and nearly stationary subjects.  Indeed, there were times when the shutter maxed out at 1/4000th and I wished I'd brought a neutral density (ND) filter or even a polarizer to cut down the light.  (This is one reason I am pleased that the new Olympus E-M1 has a maximum shutter speed of 1/8000sec.)