10.26.2015

A few final (?) fall images.

I took some time on Friday to jump in the car to look for some final fall foliage.  It was a bit cloudy and windy, and leaves were falling fast, but I did at the very least find some spots that might yield good images next fall.

The lack of light was generally a problem because the clouds were thick.  Even bright colored maple leaves need light from the sky to be at their best (generally).

Below are five images I decided keep.


10.24.2015

Golden hour images on the coast of Maine

These images go back a couple of weeks to a week my wife and I spent in a cabin on Penobscott Bay in Maine.  We've been there a number of times and it does seem that I take fewer and fewer pictures.  But I still like getting up to see the sunrise with my camera in my lap.

One nice thing about October sunrises is that they are so much later than summer sunrises.  It's so much more civilized to get up and ready for a 6:45 sunrise...nearly an hour later than when we visited the same area in August. Generally, too, the air is cleaner, though this year it was cold enough all week so that many of the cabins in the area (including ours) had active wood stoves emitting smoke that wafted across the cove.

Interestingly, the sky most morning (exceptions below) was so clear of clouds that the sunrises, though absolutely beautiful, were not particular awe-inspiring from a photographic standpoint.  Don't get me wrong.  I enjoyed each of them!

The first and last images were taken during the evening "golden hour". The middle three were taken during the morning "golden hour". All were on different days.

Five of my favorites from the trip:


10.20.2015

A couple of fall iPhone shots

Sometimes it pays to get off the highway.

I was trying to get to my dad's nursing home for a visit last Friday, when I came upon a huge traffic back-up on the three lane highway I was traveling. My solution was to get off at the next exit. I meandered my way through the rural countryside around Bolton, MA.  The scenery was beautiful, though fall foliage was probably a week short of "peak".

The only camera I has was the one on my iPhone.  Here are two shots I liked.  Other than perhaps being limited by the wide angle (equivalent to 30mm on a full frame camera), I was limited in these two images by wire cattle fences or "no trespassing" signs.


In the image below, if you follow the line of clouds into the distance you will come to Mt. Wachusetts near Worcester, MA.

10.12.2015

An old Ford and an old Chevy. Sometimes you just get lucky.


This was taken in Searsport, Maine during a recent vacation.  We always stop at the Dunkin Donuts behind the Sunoco station for an afternoon pick-me-up cup of coffee after many hours of driving along the Maine coast.

(Of course, I am now kicking myself for parking my silver van so close.  You can see it on the left.)


Another angle


10.01.2015

First shots with the old Minolta 100mm macro plus Sony A6000

In my prior post, I talked about my experience with an old Minolta 100mm macro lens on my Olympus E-M1.  With this adapted lens, I felt there were some focusing challenges with the Olympus that resulted in fewer "keepers" than I had hoped for.

It seemed to me that the lens was very sharp, and I certainly enjoyed its smooth action.  But I missed focus more than I was prepared for.  In other words, sometimes the area that turned out to be in focus, when viewed on my computer, was slightly off from the area I intended to be in focus.

Missed focus is inevitable with flowers out doors.  It was caused by either my slight movement or the movement of the flowers, or both.  A tripod would have prevented camera movement but not flower movement.  Bringing the flowers indoors and using a tripod would obviously have been a solution.  But to my way of thinking, it wouldn't have been much fun.

The reason I wanted to try this same lens on the Sony a6000 is that the Sony has focusing assistance that is, in some ways, the opposite of what's available on the Olympus.  I feel that with Olympus, there is too much lag between achieving focus and releasing the shutter.

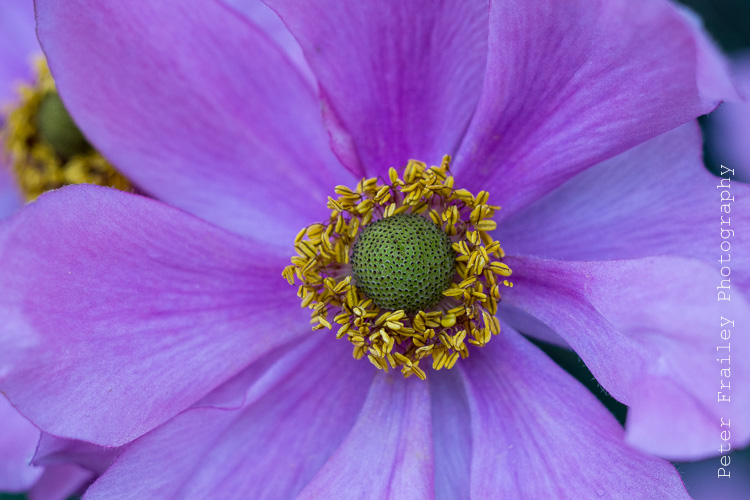
Sony A6000 plus Minolta 100mm F3.5 macro plus Nissan i40 flash


Bottom Line:  I think I get more accurate results with the Sony.

Here are the differences in how one focuses these two camera bodies, at least when using adapted manual focus lenses.

1) Focus Peaking:

a) The Olympus focus peaking, when shooting macros, shows too great an area in focus... more than what actually is in focus.  The Sony focus peaking shows a narrower and more accurate (IMO) area of focus, though if there is not enough contrast, sometimes the peaking does not work at all! Again, I'm only concerned here with macro focusing.

b) The Olympus focus peaking works when the shutter is unpressed.  However, it disappears when half pressed, leaving an operator time-lag between focus and shutter release.  The Sony focus peaking works when the shutter is unpressed, but continues to work when half pressed. The photographer can therefore ride the shutter button half-pressed while focusing.  This reduces operator time-lag between focus and shutter release.

2) Magnification:

a)  Both systems offer magnification choices.  The Olympus allows magnification of 3x, 5x, 7x, 10x and 14x.  The Sony offers 5.9x and 11.7x.

b) The Olympus maintains the magnification all the way through the shutter press.  This helps me maintain focus.  However, you are unable to see your overall composition.  The Sony loses magnification at the half press which makes me feel I've lost focus.  On the other hand because it pops to full view when half pressed, I am able to confirm my composition.  For landscapes, I would prefer the Sony choice. YMMV.

A few sample images:


9.30.2015

First shots with the old Minolta 100mm F3.5 macro plus Olympus E-M1

Tuesday was a good day to play hooky from work and spend the morning at our local botanic garden with my "new" old Minolta 100mm macro. I have had it a few weeks, but this was the first time we'd gone outside to play.


I was hoping for more flowers at the garden, but it is late in the season.  Many of the flowers looked a bit well-worn.  On the other hand, we've had little rain this summer so expectations should be kept realistic.


The Minolta is a heavy lens weighing in at 22 ounces. That's a whopping 25.5 ounces with adapter!  But I lugged it around on the E-M1 for 2 1/2 hours and didn't feel that it weighed too much.  In fact, I had the Olympus 36R flash in the hot shoe the entire time too; although I used the flash perhaps only 1/3 of the time.


I used a small "kiss" of flash with these four:


All my shots were hand held at 1/250 sec or more.  This lens has an effective focal length of 200mm.  All the formulas suggest that for this focal length a shutter speed of 1/250sec should be fast enough to remove camera shake.

I left in-body-image-stabilization on.  Some might argue that I should have turned it off because it was unnecessary at that shutter speed.


I switched back and forth between F4 and F8.  Both F stops seemed sharp. I believe the lens is sharper on the E-M1 than my two other manual lenses of similar focal length, the Nikkor 105mm AI-S F2.8 and the Tamron 90mm F2.8. I was pleased also to see no CA, a problem that I find on both the Nikkor and Tamron.


Focusing was a challenge, even with the focus aids in the E-M1.  These focus aids work almost the opposite of those on the Sony a6000, so I am looking forward to trying my hand at that combination in a few days.


Here were my two focusing challenges:

1) Focus peaking.

a) I find that the Olympus focus peaking is not selective enough to be accurate for macro work.  For example, if shooting down at a 45 degree angle onto the horizontal surface of a flower, I might see a speckled band of white (the focus peaking is set for white) 1/4" wide across the flower, supposedly highlighting that which is in focus.  Yet the actual depth of field, where sharpness is adequate, might only be expected to be 1/16" or 1/8". One would surmise that the middle of the 1/4" band would be the sweet spot; however, I often found that the sharpest "plane" of focus was slightly behind where I intended it be.  Perhaps with more experience and practice I will make some mental adjustments and get the focus on target more frequently.

b) As soon as you half press the shutter the peaking disappears.  Perhaps not a problem with a landscape, but I find with macro work that there is too much operator time-lag between focusing and full release of the shutter.

2) Magnification

The magnification works great.  I like the fact that the magnification is maintained even when the shutter button is half pressed or fully pressed. The bad news is that while in magnification mode, you loose sight of your frame.


__________

Next up: I'll try the same lens on the Sony a6000.

9.13.2015

I've bought another old manual focus Minolta lens

Now that I have purchased (for a reasonable price on eBay) my third manual focus Minolta lens, I feel I officially have a "collection".  This assumes I am allowed to call 3 or more of anything a collection!

Seen below are, left to right: 100mm F3.5 macro (newly acquired), 50mm F3.5 macro, and 35-70mm F3.5 macro zoom.  Also pictured below are the adapters (about $20 each on eBay) that allow me to use the lenses joyfully on my two mirrorless interchangeable lens cameras, a Sony and an Olympus. 

In addition to making nice images (with limitations due to old technology and being designed for film), I have "collected" these lenses because they look and feel great.  The focus rings are smooooth and the lenses are all metal.  


I love all the markings you find on the lens barrels as you focus (or zoom on the 35-70) and the lens telescopes out..., although other than the distance scale, the f-stop, depth of field scale, and the focal length adjustment on the zoom lens, I frankly don't know what some of the other markings mean.  One guess is that some of them relate to light gathering adjustments that are made as focus changes. Since I use a live histogram on the camera all the time, I don't really need the information on the lens barrel to make EV adjustments. Other markings are clearly related to magnification ratios at different focusing distances.


UPDATE

I received some additional information by email from my friend Dennis Mook.
Dennis first owned Minolta gear in 1971 and still has the Minolta SRT-101 camera plus Minolta Rokkor 55mm F1.7 lens it came with.

Here is what he writes about the various markings on the lenses:
As far as your lenses, on the zoom, the red lines reflect where one would correctly focus the lens if one were using infrared film.  Infrared light focuses in a different plane than visible light.  The three lines reflect three different focal lengths.  So what you would do is to focus the camera thought the lens, then move your focus point over to the appropriate red line, depending upon the focal length in use. 
On the macro lenses, the white markings reflect magnification of the image when using the lens alone.  As you can see, it only focuses to 1:2, or half life size.  Minolta also made an extension tube so the lens could focus to life size, or 1:1.  The markings off to the sides are the required exposure compensation for different magnifications.  When these lenses were manufactured, almost no camera automation existed. The rule of thumb that I remember was you had to open up two stops for a life sized or 1:1 magnification. 
The curved lines are depth of field scales (for 35mm sized film or sensors; they won't apply to other sized file or sensors) for pre-focusing and/or zone focusing. 
Dennis
Check out Dennis' wonderful photography blog at www.thewanderinglensman.com and/or his Web site at www.dennismook.com)


9.09.2015

A few more from Maine: Blue sky and (mostly) puffy white clouds

One of my favorite things to capture "on film" (I don't use a film camera any more, but I can't think of a digital equivalent... "on sensor"?) are landscapes with bright blue sky and puffy clouds.  Add water to the mix and compositions (at the correct angle to the sun) will scream for a polarizer.  In fact, I've been finding that if I have blue sky + clouds + water (or any two of these three), I just leave the polarizer on.  In such a scenario there's always enough light not to worry about the polarizer blocking one or two stops of light.

The images below were all taken with a polarizer and all but the stone tower were taken at ISO 200 (base ISO on the E-M1).  The stone tower was mistakenly shot at ISO 1000 which was entirely unnecessary.

Pursuant to my last post, I find that only 5 of the 16 images below were left "untouched" at the Olympus' native 4:3 aspect ratio.  The other 11 were cropped to 3:2, which is my preferred aspect ratio for landscapes.


Mcloon's Wharf, Spruce Head Island

Somewhere near Thomaston

Miller's Lobster Company (shack and pound, too)

Tower on Mt. Battie, Camden

Belfast
Belfast

Searsport

Penobscot Narrows Bridge, Bucksport

Old Farm, Cape Rosier area
Goose Falls
Penobscott Bay

Stonington Bridge

Weir Cove

Camden

Penobscott Bay