Showing posts with label Olympus E-M5 user review. Show all posts

7.27.2012

Olympus E-M5 Post #11: Dynamic Range Part 5

A while ago I tested the Panasonic GH2 and the Olympus E-M5 to see if I could see a difference in the dynamic range of the camera.  In the last test I did I determined that when it came to the shadows I really couldn't tell the difference.  But from what I've read, there should be a noticeable difference in the highlights.

So, I decided to check this out on my own.

I shot the scene in the images below in P-mode with my reg43 14-54II zoomed out at 14mm on both cameras.  To simulate a high dynamic range situation,  I shot (1) a base case, (2) 1-stop overexposed, and (3) 2-stops overexposed.  I didn't care that the F-stops and shutter speeds chosen by each camera were different.  I simply shot the way I would in the field when shooting landscapes, using the live histogram to guide my exposure settings, but adding 5-shot auto exposure bracketing to get the two overexposed shots.  All images were taken in raw.

Base Images

Below are the base images, after tweaking in Lightroom 4.  The tweaking meant adjusting the highlights and white sliders to get a better (i.e. darker) exposure in the clouds and sky, and adjusting the shadows slider to get a better (i.e. brighter) exposure in the dark areas.

My usual Lightroom slider settings for landscapes are:

highlights = -50
shadows = +50
whites = -50

Oly on left, Pany on right.  Shooting the Pany at 3:2 aspect ratio was an error.  Both pictures were taken
in the camera's P-mode in RAW, with adjustment to highlights, white point, and shadows done in Lightroom 4.
I don't see any dynamic range differences in my final images, at the base exposure setting.


Overexpose by 1-stop

The next set of comparative images are shots taken with 1 stop more light.  No Lightroom adjustments were made to this next set of images.  Both images just barely kept all the pixels within the histogram range.  The clouds look bright, but they are not blown out. There is detail throughout.  At 1-stop overexposure the sensors on both cameras are reaching their limits, it would appear.


The next two images show what can be done in post-processing to improve these two images.  Highlights were pulled back and shadows opened up using the the highlights, whites and shadows sliders in Lightroom 4, to create very satisfactory images. The Olympus images seems to show more "haze" in the sky; but I am guessing most of that is due to changes in the sky during a short time delay as I switched lenses on the two cameras.

Bottom line: I am happy with both of these images, though I think highlights are getting close to being clipped on the Panasonic image.


Overexposed by 2-stops

At 2-stops of overexposure, the sky seems blown out on both.  Neither of the two images below seem particularly great and I thought there'd be no way I could recover any highlights in Lightroom 4.


But I was entirely shocked (and excited) when I set to work with the highlight, whites, and shadows sliders in Lightroom 4.  Look how great the recovery was with the Olympus image, below left. The Panasonic image, on the other hand is beyond repair.


Conclusion

I'm not going to sell my GH2 because of this.  (Actually, I will probably sell it when the GH3 comes out.)

I need to be practical when comparing the GH2 and E-M5.  I have 350 images from each camera from a two week trip to the Canadian Rockies.  I don't have even one example where I ran out of headroom and footroom in post-processing.  And I never had an accidental exposure where I needed to recover two stops of highlights like the examples above. I should point out that this experience was with many landscape scenes with dark pine forests and snow capped mountains. 

Having said that, this does show that there can be (IMHO) an advantage to using the histogram to add a bit of positive EV compensation.  Sometimes this is called ETTR (exposing to the right).  In so doing, you can add exposure to the dark areas before post-processing. And then, to bring back color in the sky you can pull back a bit with the Lightroom sliders that effect highlights and the white point.

With Lightroom 4 I am finding the following setting to be a good starting point for almost all of my  travel and landscape pictures:

highlights = -50
shadows = +50
whites = -50
blacks = adjust to taste and to get more/less contrast

I know there is a clamouring for more dynamic range.  I read about it in all the online forums. But I don't know how much more we really need.  I am very happy with what I have now.

In the next generation of sensors, I'd gladly give up any additional dynamic range in exchange for lower ISO's like 100, 80 or 50.

5.26.2012

Olympus E-M5: Post #10: Adding the grip accessory

I had pre-orderd the HLD-6 grip just a few weeks after I pre-ordered the E-M5, both in February.  The grip arrived earlier this week and is a great addition to this otherwise (too?) small interchangeable lens camera.

I was a bit worried when I pulled out of the box a thicker-than-expected set of directions.  But my worry was ill-placed, as the directions were in about 100 languages (and I only needed one!)  Actually, all I really needed to install the grip was the picture diagram shown in the set of images below.

The grip in ingenious.  It comes in two pieces.  The first piece can be used independently from the second piece.  It is a horizontal grip that provides a much more secure grip for the right hand when holding the camera in the landscape orientation.  Interestingly it provides an additional shutter and front control dial.  These are duplicates; they do not add any features, but merely give another location for dials of similar function on the main camera.  Unfortunately, it does make it a bit more awkward to reach the two function buttons (Fn2 and Rec buttons) on the top plate.

The second piece is the vertical grip. It must be attached to the horizontal grip. I am very much looking forward to using this accessory. I take a lot of vertical landscape images and have always noticed that when I hold a camera in the vertical orientation that my hold is less secure and a bit wobbly.  Since I rarely use a tripod, I depend on a strong, stable, steady grip.

Two batteries are accommodated, though none are supplied with the grip and at this time authentic replacement batteries are not yet available.  One battery remains in the main camera battery, so if you remove one or both grips, you are "good to go".  The second battery resides in the vertical grip.

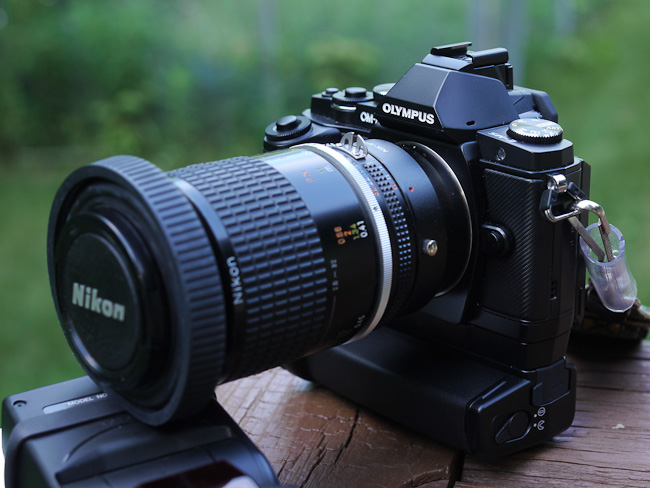
Below are a dozen images taken while assembling the grip, in sequence.  The old Nikon lens is attached with a Nikon-to-m43 adapter (about $20 from eBay) and a 105mm macro lens.


At this point in the process, just the horizontal grip
has been added.  Note the double shutter button
and double front wheel.  You can use either.

The vertical grip is then added to the horizontal grip.  Just screw them together
tight enough so the electrical contacts are made.

Voila

My intial impression is that the vertical grip should be a bit deeper.
It's actually shallower than the horizontal grip.

One battery can be housed in the handle, and one
in the main body.  Currently I have only one
battery... and it is in the handle for eacy access.

Old Nikon 105mm micro


5.11.2012

Olympus E-M5: Post #9: Dynamic Range Part 4

If there is a dynamic range difference between the two year old Panasonic GH2 and the new Olympus E-M5, I can't see it in the shadows.  Since tests by dpreview show that there actually is a difference, with the Olympus seeming to have 2/3 of a stop more dynamic range in the shadows, I am wondering if testing devices are so good these days that they can see nuances that escape the human eye!  Or, maybe I need to do some testing at higher ISOs.

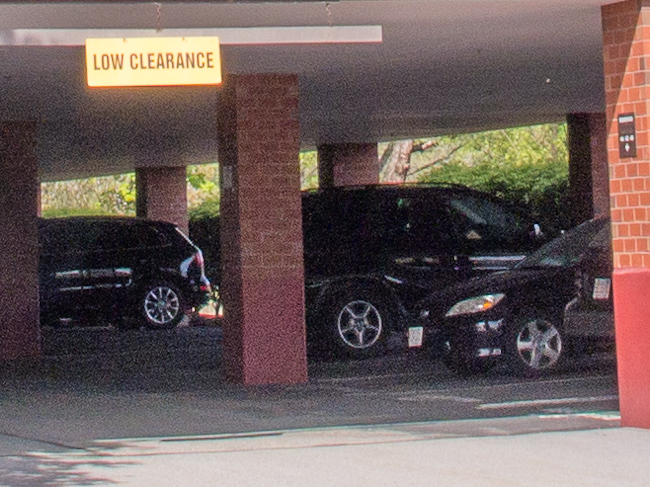
Below are two images taken with the same lens, switching between cameras on a bright sunlit day with deep shadows in the parking area under this office building.

Both images were developed from RAW with default settings in Lightroom 4, except white balance.  I equalized the white balance settings at the daylight setting of 5500 degrees Kelvin.  Interestingly, the Panasonic metered at 4950 degrees and the Olympus at 5250 degrees. This was in spite of the fact that I have made no white balance adjustments in the cameras

If you see a difference with respect to dynamic range, between the Oly and the Pany, your eyes are better than mine.  Perhaps I see slightly more detail in the Oly in the 100% crops, but is that just because I know there is "supposed" to be?

In each of the following pairs of images, Olympus is first, Panasonic is second.  Larger images are on my Web site, here:
http://www.peterfraileyphoto.com/olympus-em5-dynamic-range-pt4


Olympus 1/250th F8 iso200 14mm (14-54II)

Panasonic 1/250th F9 iso160 14mm (14-54II)
100% crop of Olympus image, of parking area entrance under the building
100% crop of Panasonic image, of parking area entrance under the building

Olympus at 100% crop. Shadow slider at 100% to open the dark area under the garage.

Panasonic at 100% crop.  Shadow slider at 100% to open the dark area under the garage.

Conclusion

[Edited July 25, 2012]

As I mentioned in the opening paragraphs, based Based on these images I can't see (any practical) tell the difference in dynamic range (or image quality for  that matter) between the two year old GH2 and the new E-M5.  And that is after looking at 100% crops and trashing the image by running the shadow slider to 100%.  As far as I am concerned both cameras have fantastic image quality.


But
But, on the other hand I haven't checked out the highlights.  I intend to take a couple of comparative images with blown highlights at various overexposures to see which camera is able to recover details better in blown exposures.  This will be a topic for another day and for another post.

5.09.2012

Olympus E-M5: Post #8: Dynamic Range Part 3

I received an email about the last couple of posts.  Seems my conclusion that the dynamic range of the E-M5 and GH2 is similar is contrary to what's being published on the Internet.  According to many users and reviews it is claimed that the dynamic range of the E-M5 is higher than the GH2.

That may be true and I hope it is!  But, actually what I posted in the prior two posts was that in the one shot in which I compared the two cameras the dynamic range was similar.  Assuming for the moment that the dynamic range of the E-M5 is greater than the GH2, the reason that they seemed similar in my example is because the sensors were not being stressed enough to show a difference.  I plan to try the experiment on some images in more challenging situations, although my guess is that in the "real world" the difference will not really make a difference.

With regard to the images I used in the prior two posts, examining the histograms shows that though there were bright areas (clouds) and dark areas (pine trees) in the scene, that this was all handled nicely by the sensors.  As you can see below, the histograms are pretty normal (and very similar), with few pixels on the black and white ends of the spectrum.  There were no "blown out" highlights and no "blacked out" shadows.

Olympus E-M5 histogram of original image in prior post

Panasonic GH2 histogram of original image in prior post
I'm working on another sample in which I have definitely created a dark scene within a relatively bright scene.  The dark areas will come from a parking lot under my office building. It will be the subject of my next post.

5.08.2012

Olympus E-M5: Post #7: Dynamic Range Part 2

For this post, I have taken yesterday's two images (see prior post) which were processed from RAW files at default settings in Lightroom 4 and today I "opened" the shadows using the Shadows Slider in Lightroom.  I moved the sliders all the way to the right, to 100%. In this way I "engineered" more dynamic range.

The first two images are the "before" and "after" shots from the Panasonic GH2 and the second two images are the "before" and "after" from the Olympus E-M5.

Panasonic GH2 before and after shadow slider adjustment


Olympus E-M5 before and after shadow slider adjustment


My Conclusion


Clearly there is a difference between the before and after shots. But when it comes to comparing the two "before" shots to each other, and the two "after" shots to each other, I don't see any meaningful differences. I would have to conclude, at least for this scene, that the dynamic range of the two sensors is the same. That is, both captured details in the highlights and the shadows equally.

Off topic:  I do feel that panasonic images have a bit more magenta in them, as seen in the black macadam driveway.


Larger files of the four images can be found here:
http://www.peterfraileyphoto.com/em5dr2

5.07.2012

Olympus E-M5: Post #6: Dynamic Range Part 1

Much of what I have read tells me that the dynamic range of this new Olympus has improved over other recent Olympus m43 offerings.  This may be true, but the only m43 format camera I have to compare it with is the flagship of the Panasonic line, the GH2.

Dynamic range refers to the camera's ability to provide decent detail in both the brightest and the darkest areas of a picture.  After all, when you take a picture, the camera provides only one exposure and it is usually an average based on light tones, mid tones and dark tones.  Mid tones might be exposed perfectly but light tones might be overexposed and dark tones underexposed.  The less the dynamic range, the more likely this will be the case.  And of course it is especially noticeable in images where there are both lots of bright areas and lots of dark areas.

Today, I compared the GH2 and E-M5 with a couple of pictures that had both bright areas (white clouds) and dark areas (shadows in the trees).  As it turns out, neither camera was stressed by these conditions and both did a very nice job providing details in the clouds and sky while at the same time not being too dark in the shadows.  Of course, the human eye would be able to see more deeply into the shadows than this, but a camera's sensor does not have the dynamic range of the human eye.

As far as I can tell, if there is a difference, it doesn't make a difference. These both look good to me, and quite similar.

However, I will try to find a more rigorous test.  This will require a scene with even more contrast, with brighter brights and darker darks.

These two images are jpegs created from raw files in Lightroom 4.  The lens was the Olympus 14-54II.  Both were shot and 1/125th and F11.  I used P-mode and autoISO.  Both cameras set ISO at base levels of 160 (Pany) and 200 (Oly).  In Lightroom I set WB at 5500 Kelvin.  I used "Auto Tone" to equalize the exposure, contrast, and saturation settings.  I used Lightroom's default sharpening settings.

If you want to see bigger files, they're here:

http://www.peterfraileyphoto.com/em5dr

Panasonic GH2 with Olympus 14-54II.  A bit more magenta than Olympus even
at the same WB setting. Note the "purple-ish" color cast in
the driveway asphalt.  But the dynamic range seems the same as the Olympus
(see below).

Olympus E-M5 with 14-54II. Dynamic range seems to be equal to the Panasonic.  To me, both look good.


Conclusion:  As far as I can tell in these two shots the dynamic range is the same.  I do like the color profile of the Olympus shot.  It doesn't have the purple color cast that I see in the Panasonic file.  A tweak here or there in Lightroom might get rid of that. Noise and sharpness seems identical.

The next step with these images it to see if one file is easier than the other to bring up (i.e. lighten) the shadows, as the shadows here are darker than what my eyes saw.  In other words, perhaps we can "engineer" more dynamic range better from one than the other.

5.05.2012

Olympus E-M5: Post #5: Butterflies

For folks interested in the new Olympus E-M5, I have posted on my Web site 3 images of each of 16 photos of butterflies taken today.  The link is below.

This is for geeks.  In each case I am showing (1) the Olympus out-of-camera JPEG followed by (2) Colorchecker Passport JPEG from RAW in Lightroom 4, and (3) Adobe Standard JPEG from RAW in Lightroom 4.

Yes, there are subtle differences, but I only notice it on larger sizes. To my way of thinking "the differences between them don't make a difference."

Below is one example.  See!  No (significant) differences.

The rest are on my Web site here:

http://www.peterfraileyphoto.com/butterflies2012may5


5.03.2012

Olympus E-M5: Post #4: Image Set #1

For some reason I have been reluctant to use the E-M5 during this period of getting used to its menus and settings.  On the other hand, the weather hasn't been conducive to getting outdoors much, notwithstanding that the E-M5 is weather resistant.

I did, though, take a few indoor shots the other day, when my granddaughter came to visit.  The pictures below don't reveal much, however.  They're not particularly good or particularly bad, and could have been taken with most any camera.  And I should have stepped back on a couple of occasions so as not to crop her head and/or feet.

One was taken at ISO200 and the remainder at ISO400, so the sensor was certainly not stressed.  The best thing about these images is the subject!

Lenses Used

50 year old Nikkor 58mm F1.4

Olympus 14-54II
Sharp enough?  Not really.

All of the following were shot at 1/60th and had a bit of bounce-flash.  But since most of the light was ambient light, I wish I'd shot them at 1/125 to freeze the action a bit more.  On second thought, perhaps I was having difficulty focusing.  The Nikkor lens must be manually focussed and the Olympus lens has a slow auto focus (the Olympus lens is optimized for phase detection focusing on the Olympus dSLRs and not contrast detection focusing on the micro 4/3 cameras).  And of course, there's our granddaughter constantly moving, making accurate focus all that more difficult.

I do feel that these images are soft. But that is operator error, not camera error.

JPEG Versus RAW

My E-M5 is currently set at the default color settings: natural picture mode, contrast and saturation set at "0".  I have turned noise reduction to "off" and sharpening to "-1".  Auto WB. 

Immediately below are two images processed from the same file.  The first shows an out-of-camera JPEG image, and the second shows a JPEG processed from the RAW file with Lightroom 4, on my computer.  I found the JPEG to be a bit off, with bit too much saturation, in particular too much red.   I really like the processing done on the RAW image with Lightoom, using Lightroom's default setting and color profile. 


Interestingly to me white balance seemed to be too amber and too green on the images taken with the old Nikkor lens.  I can't figure out why that would be the case because the white balance readings are made through the lens.  Anyway, I did make some white balance adjustments for Nikkor shots, using the Lightroom sliders.

Taken with 50 year old Nikkor 58mm F1.4, set at F2


Taken with Olympus 14-54II, at F3.2


Once I test the camera outdoors, I may make some adjustments to the camera; for example adjust the white balance to read more blue, amber, green or magenta.  Like most advanced cameras, there are settings available to make adjustments to white balance, whether it be making fine-tuning adjustments to the automatic white balance or to any of the white balance presets.

5.02.2012

Olympus E-M5: Post #3 - More about menus

I spent much of the morning reading the just published comprehensive review of the E-M5 on www.dpreview.com.  They gave it a gold award with a score of 80 (of 100).  This is a marvelous score for a micro four-thirds camera.  I think the top score I've ever seen for any camera is 89.

In my last post I observed that the menu system was a bit frustrating even though I had owned two Olympus dSLRs previously. The staff at dpreview also found the menu to be rather "daunting".   Though the customization options are huge (a plus), settings can be complicated (a minus).  As mentioned in the dpreview summary, "some of the most useful features are hidden behind combinations of settings that are sometimes obscurely-named."

Dpreview counted 16 tabs within the custom menu and inside of these they found 85 settings, and some of those 85 settings required additional clicks to get into sub-topics.  Wow, is that ever customizable and complex!

Dpreview has helped the user with two pages of menu charts (pages 9 and 10 of their review).  The charts start here.

I wish they'd make available a concise two page downloadable pdf of these charts.

4.29.2012

Olympus E-M5: Day #2

I downloaded the full Olympus E-M5 instruction guide and prowled through it as I clicked the buttons on the back of the camera to see what each menu item would do.  Oly's advanced cameras are very intricate and the menus are actually a bit frustrating.  They run deep with features, and I find on occasion that to get one feature activated the way I want, I am required to adjust two menu items. This is both good and bad.  The bad is that it takes a long time to figure things out.  The good is that your options are almost limitless.  If you are a prior Olympus dSLR or PEN owners, much of this will come quickly for you.  I can't imagine how onerous setting up the camera will be to owners new to Olympus.

An example of running deep is the activation setting for the "Live SCP" or Live Super Control Panel.  For me, this feature is a keystone to operating this camera because when I activate it on the monitor with a press of the OK button, a grid is displayed showing 21 of the important camera settings, such as ISO, White Balance, and Flash EV Adjustment. The grid is interactive.  You can enter the grid by pressing the OK button or touching the screen.  This gives you access to each feature so you can make your desired adjustments within that feature.  No menu diving required!

To get to the Live SCP setting so that I can turn it on (or off), things get a bit complex. Even after I found the setting, it took a few tries to get back to it a second and third time.  Here's what you need to do (I didn't even count the menu clicks, but it was a bunch): press the menu button to activate the menu > Custom Menu > Custom Menu D > Control Settings > P/A/S/M > Live SCP > off/on.  Based on what I read on the various Internet forums, some owners are still trying to find this option.

Bracketing is an example of needing to adjust two settings.  Just setting the bracketing to the number of shots and the bracketing EV amount is not enough, as you will then be forced to press the shutter once for each bracketed shoot.  I don't know anyone who wants to do this, though I can respect that Oly wants to provide this option.  If you, like me, want to press the shutter just once to activate all of the bracketing shoots, you also need to activate sequential shooting.  To speed things up in the field, most owners find the best solution is to reduce these double settings to one, by creating a customized "myset" that includes both. 

There are then two approaches to turning on bracketing:

The first approach is to use the menu.  This is what I used on the E-620 and E-520. It's only a couple of clicks into the menu. When I want sequential bracketing I go to myset2.  When I want to go back to non-bracketed non-sequential shooting I go to myset1.  On the E-M5 I will continue to do it this way, if I am planning to take a number of bracketed sequences.

The second approach is to set up function button Fn1 with myset2. Mysets don't appear to be available as an option on any of the other function buttons.  That's too bad, as it means I can't use Fn1 for AEL/AFL, which is the traditional location for a AEL/AFL button.  (The Fn1 button is on the back of the camera, on the top right side, and most easily pressed with the right thumb.)  Incidentally, as a function, mysets are not "sticky".  You need to press the function button down and hold it down with your thumb, while pressing the shutter.  This is why the function buttons on the top plate cannot be set to mysets - it's impossible to hold down a top plate function button while also pressing the shutter.  On the other hand, if Oly would allow the myset function to be "sticky" like the AEL/AFL function allows, then you could use it effectively with buttons on the top plate... which I would prefer.

[Edit: I'm not sure I am using the term "sticky" correctly here or not.  The word "toggle" might be more accurate.  What I mean is that the AEL/AFL function can be turned on with one press and turned off with a second press.  So, you don't have to hold it down to have it work. On the other hand, the Myset function turns on as long as you hold the button down and turns off as soon as you release the button.  I've not yet found a way to change this.]

The Fn1 function button is very difficult to reach with the right thumb, in my opinion. 
You compromise your grip when you reach for the button because
your thumb leaves the really nice rubber thumb pad. 

I find that I must bend my thumb into the shape of a "C" so I can
press with the tip of my finger or my fingernail.  It is also very squishy with no
nice click to it.

Learning the Camera

I think the best way to learn a camera is to go through all of the menu items and options.  This trains your fingers as well as your mind. Every time you come to a menu item that confuses you, go to the manual and learn what it does.  I think I now have things the way I want them, based on what I understand to be available and not-available features.  It took about four hours to get to this point.  Contrast that to the Panasonic GH2 which took me about one hour.

Recommendation

Only after spending four hours learning and setting up the camera did I find five very helpful pages in the full manual.  If I were to do it all over again, this is where I would start!

The section I found is called "Menu Directory" and covers pages 111-115 in the English manual.  It is organized exactly like the menus on the camera, with page references to the appropriate pages in the manual.  Once I found these pages, I kicked myself for not looking for them from the very start.  I remember now how helpful similar pages were for me when I owned the long discontinued but highly acclaimed (at the time) Olympus C-8080.

As an example of what I am talking about, page 111 of the English instruction manual is shown below.  It matches the menu items and order of items shown on the camera monitor.


4.28.2012

Olympus E-M5: Day #1

Hurray, I received my E-M5 from Adorama Camera.  [See my prior post, Olympus EM5: day #0.] Adorama is a brick-and-mortar store in New York City, and it processes its mail order shipments out of New Jersey. Once shipped from Adorama, packages arrive rather quickly to my place of work in eastern Massachusetts, often in one day, and almost always with free shipping.

My kit includes the 12-50mm lens.  This was a $300 option which sells for $500 separately.

The box looks like it is was set up very efficiently, with an empty space where the 14-42 would be if I had taken that option instead.


I found it interesting that after slipping the camera body out of the foam bag it was in, I went right to the manual to find out if it was a simple "basic" manual or a "full" manual.  I always prefer a full manual in paper form.

I was excited for a moment when I found the thick 90-page manual, but then realized that it was the "basic" manual made thick by pages in English, Spanish, and French.  Dang, this means that the full English instruction manual will be on the included CD.  You can also download it from Olympus, which I did.  It's 133 pages.

This is the basic manual.  It's a starter guide, and it won't get you very far.
Be sure to download the full manual.
The English version is available from the link in the paragraph above.
Not being supplied with a full paper manual is one of my pet peeves.